
Investing in real wood flooring is one of the most impactful decisions a Southern California homeowner can make to elevate their property’s aesthetic and long-term market value. Engineered hardwood boasting a genuine timber veneer over a structurally engineered core is highly favored for its ability to withstand climate fluctuations better than solid wood. However, even the most premium materials will fail prematurely if the installation process lacks technical accuracy.
Learning how to install engineered wood flooring correctly requires moving beyond basic instructions to focus on structural precision. Small oversight errors during subfloor preparation or layout calculation can manifest months later as hollow sounds, structural shifting, or creaking joints. For research-driven homeowners managing a high-stakes renovation, securing a professional Engineered Wood Flooring Installation eliminates these structural risks and ensures your premium planks perform flawlessly for decades.
1. Pre-Installation: The Non-Negotiable Prep Work
A beautiful finish is entirely dependent on the structural surface beneath it. In Southern California, where concrete slab foundations are standard across Orange County and Riverside, addressing subfloor moisture and flat surfaces is paramount.
Acclimation and Climate Control
Engineered wood must adjust to your home’s unique microclimate before it is secured.
- The Timeline: Planks should acclimate in the target room for a minimum of 48 to 72 hours.
- The Settings: Keep the home’s HVAC system running within normal living parameters (between 60°F and 80°F, with relative humidity between 30% and 50%). Skipping this step leads to post-installation expanding or shrinking.
Subfloor Flatness Tolerances
Do not rely on the flooring material to mask a wavy subfloor. Check the foundation using a 10-foot straightedge.
- The Standard: The subfloor must be flat to within 3/16 of an inch over a 10-foot radius.
- The Fix: High spots in concrete must be mechanically ground down, while low valleys must be filled with a premium cementitious self-leveling underlayment.
2. Choosing the Right Installation Method
Engineered wood offers versatility in how it is secured, but your home’s specific architectural layout dictates the most appropriate technical method.
Nail/Staple Down (Best for Wood Subfloors)
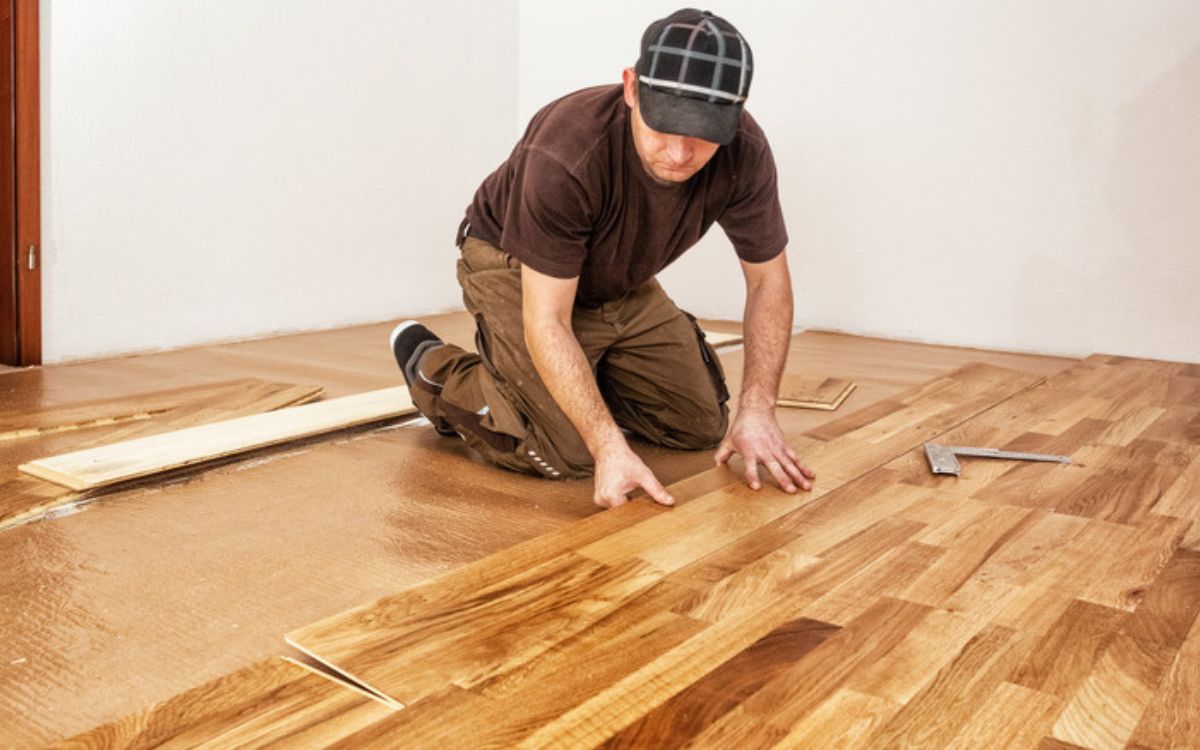
If your home has a plywood subfloor, stapling or nailing planks into place provides a rigid, highly stable hold. Installers use a specialized pneumatic flooring stapler to drive fasteners through the tongue at a precise 45-degree angle.
Glue Down (Best for Concrete Slabs)
Securing planks directly to concrete requires a premium, moisture-curing urethane adhesive. This method yields a floor that feels exceptionally solid underfoot and minimizes the hollow sound often associated with floating installations.
Floating (Click-Lock or Glue-Seam)
Planks are joined to one another rather than anchored to the subfloor, resting on a high-density acoustic underlayment. While efficient, this method requires absolute subfloor flatness to prevent vertical movement and joint fatigue when walked upon.
3. Execution: Preventing Common Layout Flaws
The hallmark of master-level craftsmanship is a balanced layout that respects structural boundaries.
The 1/2-Inch Expansion Gap
Wood naturally expands and contracts with atmospheric changes. Installers place dedicated spacers along all peripheral walls, door casings, and vertical pillars to maintain a consistent 1/2-inch expansion gap. Without this perimeter buffer, the floor will bind against walls, causing the center of the room to buckle or bow upward.
Trimming Door Jambs
Never cut a flooring plank around a door casing; this creates an unsightly gap that invites dirt and moisture. Instead, use a flush-cut jamb saw to undercut the wooden door casing, allowing the engineered plank to slide cleanly underneath for a seamless, architectural finish.
Contractor Perspective: “During recent technical audits in Ventura County, we’ve encountered multiple failed DIY floating floors where the installer failed to stagger the end joints correctly. For structural strength and a natural visual rhythm, your end joints must be offset by at least 8 to 12 inches from row to row. Avoiding repetitive patterns is what separates a premium installation from a standard one.”
4. Cost Expectations and Project Duration
Executing an engineered hardwood project involves realistic planning around budgets and disruption timelines.
- Material Investment: Premium wide-plank engineered hardwood typically costs between $8 and $18+ per square foot, depending on species and veneer thickness.
- Specialized Labor: Professional installation and technical preparation generally range from $4 to $8 per square foot.
- Project Timeline: A standard 400-square-foot living area typically requires 3 to 4 days to fully complete, accounting for prep, plank installation, and baseboard reattachment.
Technical Craftsmanship Since 1985
For more than four decades, Payless Kitchen Cabinets has delivered elite home remodeling services across Southern California. With over 40 years of business and 1,100+ verified 5-star reviews, our company is built on a foundation of transparency, structural precision, and proven results. We take pride in navigating the complex details of high-stakes remodeling, ensuring that your home investment is handled by licensed, highly experienced specialists.
Frequently Asked Questions (FAQ)
1. Can I install engineered wood flooring in a bathroom?
A. We do not recommend installing engineered wood in full bathrooms where high humidity and standing water are common. For kitchens and powder rooms, it is highly durable, provided spills are wiped up immediately.
2. What is a wear layer, and why does it matter?
A. The wear layer is the top slice of real hardwood veneer on an engineered plank. A thicker wear layer (4mm to 6mm) allows the floor to be professionally sanded and refinished 2 to 3 times in the future, dramatically extending its lifespan.
3. How do I clean my engineered wood floors after installation?
A. Avoid steam mops and wet mopping entirely. Use a soft-bristle broom or vacuum (with the beater bar turned off) daily to remove grit. For deeper cleaning, use a microfiber pad lightly misted with a pH-neutral wood cleaner.
Conclusion
A successful floor installation requires a seamless blend of premium materials and exact technical execution. If you are ready to enhance your home with engineered hardwood installed to the highest industry standards, our design and installation teams are here to assist
Book an In-Home Design Estimate with Payless Kitchen Cabinets today, or visit our local showroom to explore our 2026 engineered wood collections.