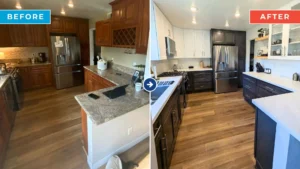

If you’ve been looking at your kitchen and wondering, how do I reface kitchen cabinets without spending a fortune, you’re not alone. Cabinet refacing is one of the most practical ways to give your kitchen a fresh appearance while avoiding the cost, time, and disruption of a complete renovation. Instead of tearing out perfectly functional cabinet boxes, refacing updates the visible surfaces, creating a modern look with much less work.
Whether you’re planning a weekend DIY project or deciding if professional help is worth the investment, this guide explains everything you need to know. From choosing materials and preparing your cabinets to installing new doors and hardware, you’ll learn how to achieve a polished result that can dramatically change your kitchen.
What Does It Mean to Reface Kitchen Cabinets?
Cabinet refacing is the process of updating the exterior appearance of existing cabinets while keeping the cabinet boxes in place. Rather than replacing the entire cabinet system, you install new doors and drawer fronts, cover exposed cabinet frames with matching veneer or laminate, and often finish the project with updated handles and hinges.
This approach works well when the cabinet boxes remain structurally sound. If the cabinets are sturdy and properly installed, refacing can provide the appearance of a brand-new kitchen without the expense of demolition and reconstruction.
Is Cabinet Refacing Right for Your Kitchen?
Before starting a cabinet refacing DIY project, inspect your existing cabinets carefully. The boxes should be level, free of significant water damage, and securely attached to the walls. Minor cosmetic flaws are acceptable because they’ll be covered during the process.
Cabinet refacing may not be the best choice if your cabinets have severe structural damage, warped frames, or a layout that no longer fits your needs. In those situations, replacing the cabinets entirely may be a better long-term solution.
Tools and Materials You’ll Need
Gathering everything before you begin makes the project much smoother. While your exact supplies may vary depending on the finish you choose, most refacing projects require the following:
- Cabinet veneer or laminate
- New cabinet doors and drawer fronts
- Wood filler
- Sandpaper
- Measuring tape
- Utility knife
- Adhesive or contact cement
- Roller for veneer application
- Screwdriver or drill
- Clamps
- Level
- New hinges
- New cabinet pulls or knobs
Many homeowners also take this opportunity for a cabinet hardware upgrade, replacing outdated knobs with modern handles that complement the new cabinet style.
Step 1: Remove Cabinet Doors and Hardware
Begin by removing every cabinet door, drawer front, hinge, handle, and knob. Label each cabinet location if you plan to reuse any components, although most refacing projects include completely new doors.
After removing the hardware, inspect the cabinet frames for dents, cracks, or loose joints. Fill small imperfections with wood filler and tighten any loose screws before moving to the next step.
Step 2: Clean and Prepare the Cabinet Surfaces
Preparation has a major impact on the finished appearance. Cabinets often collect years of grease, cooking residue, and dust that can interfere with adhesive performance.
Wash every exposed surface with a degreasing cleaner and allow everything to dry completely. Lightly sand glossy finishes to create better adhesion for the veneer, then wipe away any remaining dust with a clean cloth.
Step 3: Measure Carefully Before Ordering Materials
Accurate measurements prevent expensive mistakes. Measure every cabinet opening individually because slight variations are common, even in professionally installed kitchens.
When ordering replacement components, verify the height, width, hinge style, and door overlay. Taking extra time during this stage helps avoid delays and reduces the likelihood of ordering incorrect materials.
Step 4: Apply Kitchen Cabinet Veneer
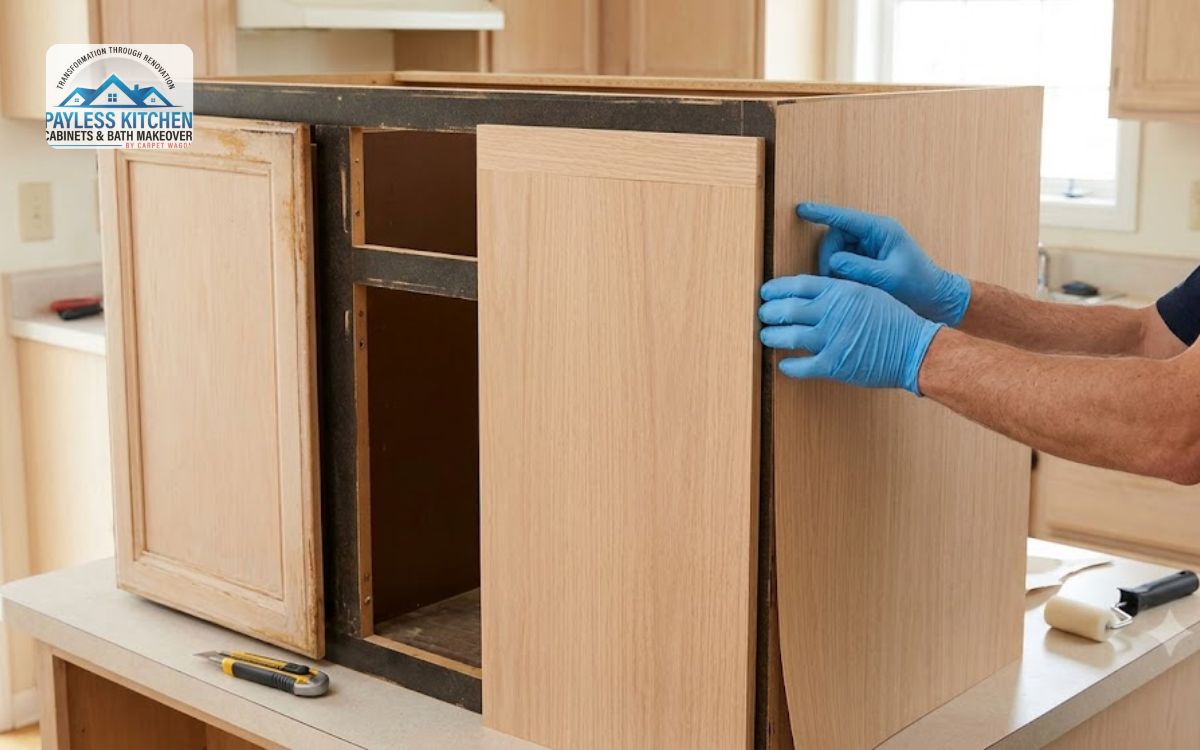
Applying kitchen cabinet veneer transforms the exposed cabinet frames so they match the new doors and drawer fronts. Veneer is available in real wood, laminate, and peel-and-stick options, allowing homeowners to choose the finish that best fits their budget.
Cut each veneer strip slightly oversized before positioning it carefully. Once aligned, press it firmly into place with a roller to eliminate air bubbles. Trim the excess using a sharp utility knife for clean, straight edges.
Take your time during this stage. Small alignment errors become more noticeable after the doors are installed, so patience produces a much more professional-looking finish.
Step 5: Replace Cabinet Doors and Drawer Fronts
Once the frames are finished, it’s time to replace cabinet doors and install new drawer fronts. This is the stage where your kitchen begins to look completely different.
Attach the hinges according to the manufacturer’s instructions and mount each door carefully. Adjust the hinges until all doors are level, evenly spaced, and open smoothly without rubbing against neighboring cabinets.
Drawer fronts should also align consistently across the kitchen. Minor adjustments during installation make a significant difference in the final appearance.
Step 6: Install New Cabinet Hardware
Installing new knobs or pulls is one of the easiest ways to complete the transformation. Modern hardware can instantly update even traditional cabinet styles while improving everyday usability.
Use a cabinet hardware template or measuring jig to keep hole placement consistent. Even small alignment differences become obvious across multiple cabinets, so accurate measurements are important before drilling.
Step 7: Make Final Adjustments
After every component is installed, inspect the kitchen from several angles. Open and close each cabinet door to verify smooth operation and make hinge adjustments where necessary.
Clean fingerprints from the new surfaces and tighten any loose hardware. These finishing touches help your completed project look polished and professionally installed.
Common DIY Cabinet Refacing Mistakes to Avoid
Even experienced DIY homeowners can make mistakes during cabinet refacing. Knowing the most common problems beforehand can help you avoid unnecessary frustration.
Some frequent mistakes include:
- Skipping thorough cleaning before applying veneer
- Taking inaccurate cabinet measurements
- Rushing veneer installation
- Using dull cutting tools
- Installing hardware without measuring carefully
- Ignoring hinge adjustments after installation
Most of these issues are preventable with careful planning and attention to detail.
Kitchen Cabinet Refacing Cost
One reason homeowners choose refacing is the potential savings compared to replacing every cabinet. The total kitchen cabinet refacing cost depends on kitchen size, material selection, and whether you complete the work yourself or hire professionals.
For a general idea of what to expect:
- DIY cabinet refacing usually costs between $1,000 and $3,500
- Professional cabinet refacing typically ranges from $4,000 to $10,000
- Full cabinet replacement often starts around $10,000 and can exceed $25,000
While costs vary by region and material quality, refacing often costs significantly less than installing brand-new cabinetry while delivering a similarly refreshed appearance.
Design Ideas to Modernize Your Kitchen
Refacing creates an excellent opportunity to update your kitchen’s overall style. Even simple design choices can make the room feel brighter and more contemporary.
Popular kitchen remodeling ideas include pairing white shaker doors with matte black hardware for a clean, timeless look. Natural wood veneers remain popular for warm, modern kitchens, while deep navy and forest green finishes continue gaining popularity for homeowners who want a bold yet sophisticated appearance.
Glass cabinet inserts can also add visual interest by displaying decorative dishes or glassware. Pairing newly refaced cabinets with updated lighting, a fresh backsplash, or new countertops creates an even greater visual impact without requiring a complete remodel.
DIY vs Professional Cabinet Refacing
Many homeowners successfully complete cabinet refacing themselves, especially if they have experience with measuring, cutting, and basic woodworking. DIY projects provide greater control over material selection and can substantially reduce labor costs.
Professional installation, however, offers advantages when working with complex layouts, custom cabinetry, or expensive veneer materials. Professionals typically complete projects more quickly and have specialized tools that help produce highly precise results.
Your decision should depend on your budget, confidence with home improvement projects, available time, and desired finish quality.
How to Keep Refaced Cabinets Looking New
Once your project is complete, regular maintenance helps preserve the appearance of your updated cabinets for many years.
Clean cabinet surfaces using a soft cloth and a mild household cleaner. Avoid abrasive scrubbers or harsh chemicals that may damage veneer or protective finishes. Wipe spills promptly, especially around sinks and dishwashers where moisture exposure is greatest.
Periodically check cabinet hardware and hinges for loose screws. Small maintenance tasks can prevent unnecessary wear and keep doors operating smoothly over time.
Frequently Asked Questions
How long does it take to reface kitchen cabinets?
Most DIY cabinet refacing projects take between three and seven days, depending on the size of the kitchen and your experience level. Professional installers often complete the work within two to five days.
Can I reface cabinets myself?
Yes. Many homeowners complete cabinet refacing as a DIY project if they are comfortable with measuring, using basic hand tools, and following installation instructions. Careful preparation and patience are important for achieving quality results.
Is cabinet refacing cheaper than replacing cabinets?
In most cases, yes. Refacing generally costs much less because the existing cabinet boxes remain in place. You primarily pay for new doors, drawer fronts, veneer, and hardware instead of entirely new cabinetry.
How long do refaced kitchen cabinets last?
Properly installed refaced cabinets can last 15 to 20 years or longer with regular cleaning and maintenance. The lifespan depends on the quality of the materials and everyday use.
Can I change the color of my cabinets when refacing?
Absolutely. Cabinet refacing allows you to choose from a wide variety of veneer finishes, paint colors, wood species, and door styles, making it easy to create a completely different look while keeping the existing cabinet structure.
Final Thoughts
If you’ve been asking yourself, how do I reface kitchen cabinets, the answer is more approachable than many homeowners expect. With careful preparation, accurate measurements, quality materials, and patience during installation, cabinet refacing can completely refresh your kitchen while keeping costs under control.
Whether your goal is improving your home’s appearance before selling or creating a kitchen you’ll enjoy for years, refacing offers an excellent balance between affordability and visual impact. By updating doors, applying matching veneer, and installing modern hardware, you can achieve a dramatic transformation without the expense of a full cabinet replacement.